Remodeling a bathroom is one of the most rewarding home improvement projects you can take on, but it’s also one that involves more moving parts than most homeowners expect. Between layout decisions, permits, plumbing, and finishes, a poorly planned project can quickly run over budget or stall halfway through.
This guide walks you through the bathroom remodeling process from start to finish, so you know exactly what to expect at each stage, whether you’re updating a powder room or gutting a full master ensuite.
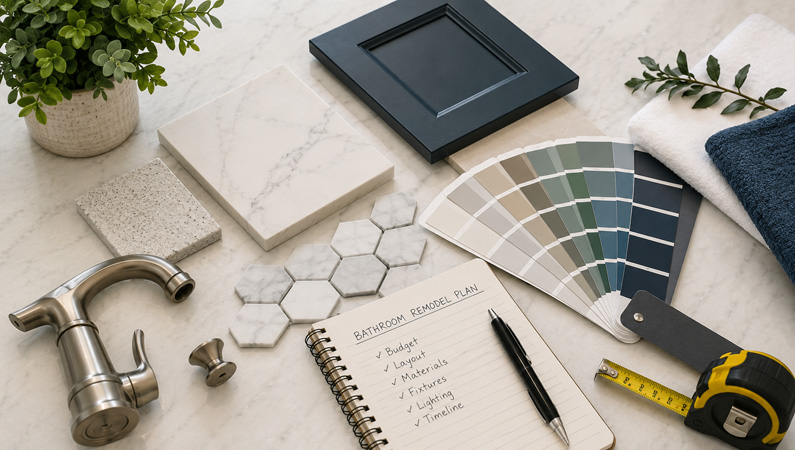
Step 1: Define Your Goals and Scope
Before anything else, decide what “remodel” actually means for your space. A bathroom project can range from a cosmetic refresh to a full layout change.
- Cosmetic refresh: New paint, fixtures, mirror, and lighting, with the existing layout staying the same
- Mid-range remodel: New vanity, tub or shower, tile, and flooring, often with some plumbing relocation
- Full gut renovation: Walls moved, plumbing rerouted, and the layout rebuilt from scratch
Your scope determines your budget, timeline, and whether you’ll need permits, so it’s worth being clear on this before you start sketching layouts or browsing tile samples.
Step 2: Set a Realistic Budget
Bathroom remodels in the GTA typically range from $15,000 to $30,000 or more for a full 3-piece bathroom, depending on finishes, fixtures, and the extent of plumbing or layout work involved. Larger ensuites with custom features like heated floors, freestanding tubs, or steam showers will push toward the higher end.
Build in a contingency of 10 to 15% for unexpected issues, since older Toronto homes often reveal outdated plumbing or hidden water damage once walls come down. For a deeper breakdown of where your money goes, see our guide on how to budget for a bathroom renovation in Toronto.
Step 3: Understand Permit Requirements
Not every bathroom project needs a permit, but many do. In Toronto, a building permit is generally required if your renovation involves structural changes, plumbing relocation, or significant electrical work, while purely cosmetic updates like swapping a vanity in the same spot or retiling usually don’t require one.
Common triggers for a permit include:
- Moving or adding plumbing fixtures (toilet, tub, shower, sink)
- Relocating electrical outlets or adding new circuits
- Removing or altering walls, including non-load-bearing partitions
- Changing the bathroom’s footprint or floor plan
You can review the City of Toronto’s official criteria on its building permit requirements page. A licensed contractor can also assess your plans and handle the application on your behalf, which is something iRemodel manages directly for every applicable project.
Step 4: Plan the Layout
If your renovation involves any layout changes, this is the stage where function gets decided. Keeping fixtures in their existing plumbing locations keeps costs down, while relocating a toilet or shower adds expense but can dramatically improve flow in a cramped space.
Things worth thinking through at this stage:
- Whether a tub, shower, or both make sense for your household
- Storage needs, including vanity size and built-in niches
- Ventilation and natural light, especially in windowless bathrooms
- Accessibility needs now or down the road, such as a curbless shower or grab bars
Step 5: Choose Materials and Fixtures
This is the stage homeowners tend to enjoy most, and also where budgets can quietly creep upward. Tile, countertops, and fixtures all carry a wide range of price points, so it helps to lock in your priorities early.
A few materials worth comparing carefully:
- Flooring and shower tile: Porcelain offers durability and water resistance at a lower cost than natural stone
- Vanity countertops: Quartz resists staining and chipping better than laminate or cultured marble
- Shower enclosures: Frameless glass gives a clean, modern look but costs more than framed options
Step 6: Hire the Right Contractor
A licensed, insured contractor with bathroom-specific experience will keep your project on code, on budget, and on schedule. Ask about warranty coverage, project timelines, and how permit management is handled before signing anything.
iRemodel Home Renovation Toronto has been serving the GTA for over 20 years, with licensed tradespeople, code-compliant work, and a one-year warranty on every project. Our bathroom renovation services cover everything from small powder room updates to full custom ensuites.
Step 7: Prepare for Construction and Timeline
Most bathroom renovations in Toronto take 2 to 4 weeks from demolition to final walkthrough, though full gut renovations with layout changes can run longer. A typical project moves through demolition, rough-in plumbing and electrical, inspections, drywall, tile, fixture installation, and final touch-ups.
Before work begins:
- Set up a temporary bathroom plan if it’s your only one
- Clear the space of personal items and confirm material deliveries
- Confirm inspection scheduling with your contractor if permits are involved
Common Mistakes to Avoid
A few missteps show up again and again in bathroom projects, and most are avoidable with the right planning:
- Skipping ventilation upgrades, which leads to mold and humidity issues later
- Underestimating storage needs in smaller bathrooms
- Choosing finishes before confirming the layout, leading to wasted material
- Starting work without confirming whether a permit is required
Final Thoughts
A bathroom remodel is a project where planning pays off. Defining your scope, setting a realistic budget, confirming permit requirements, and choosing the right contractor up front will save you time, money, and stress once construction begins.
If you’re ready to start planning your bathroom renovation in Toronto or the GTA, contact iRemodel Home Renovation Toronto for a consultation, or browse our past renovation projects for inspiration.